Arranging flowers in January...
when they are no flowers in the garden to arrange.

I wanted my first post on arranging flowers to be inspirational and make you excited for all my future posts on arranging flowers. It is, after all, the reward for all the hard work we put into growing flowers. What I hadn’t really accounted for was a) there being no flowers blooming in the garden in January (duh) and b) the bitter cold that makes arranging anything interesting in the garden suddenly not that interesting.
As we dive deep into the world of flowers, I will be sharing with you not only how to love the flowers you have in their fully glory, but how to preserve them so when we get to January, we have something to work with. I know I have lots of dried and pressed flowers, but it would be presumptuous of me to assume you do as well. Or do you??? Do you too plan ahead for these cold winter months when you need an injection of colour and life into your daily existence? A reminder there are warmer days to come?
What I thought would be nice instead is to share with you a dried flower installation I did recently, and how I did it. You may not have any dried florals to work with at the moment, but perhaps by keeping this project in mind, you can plan an installation, large or small, that you would like to do in the future. I think people are often surprised how vibrant and colourful dried flowers can be, and a project like this is the perfect way to show them off.
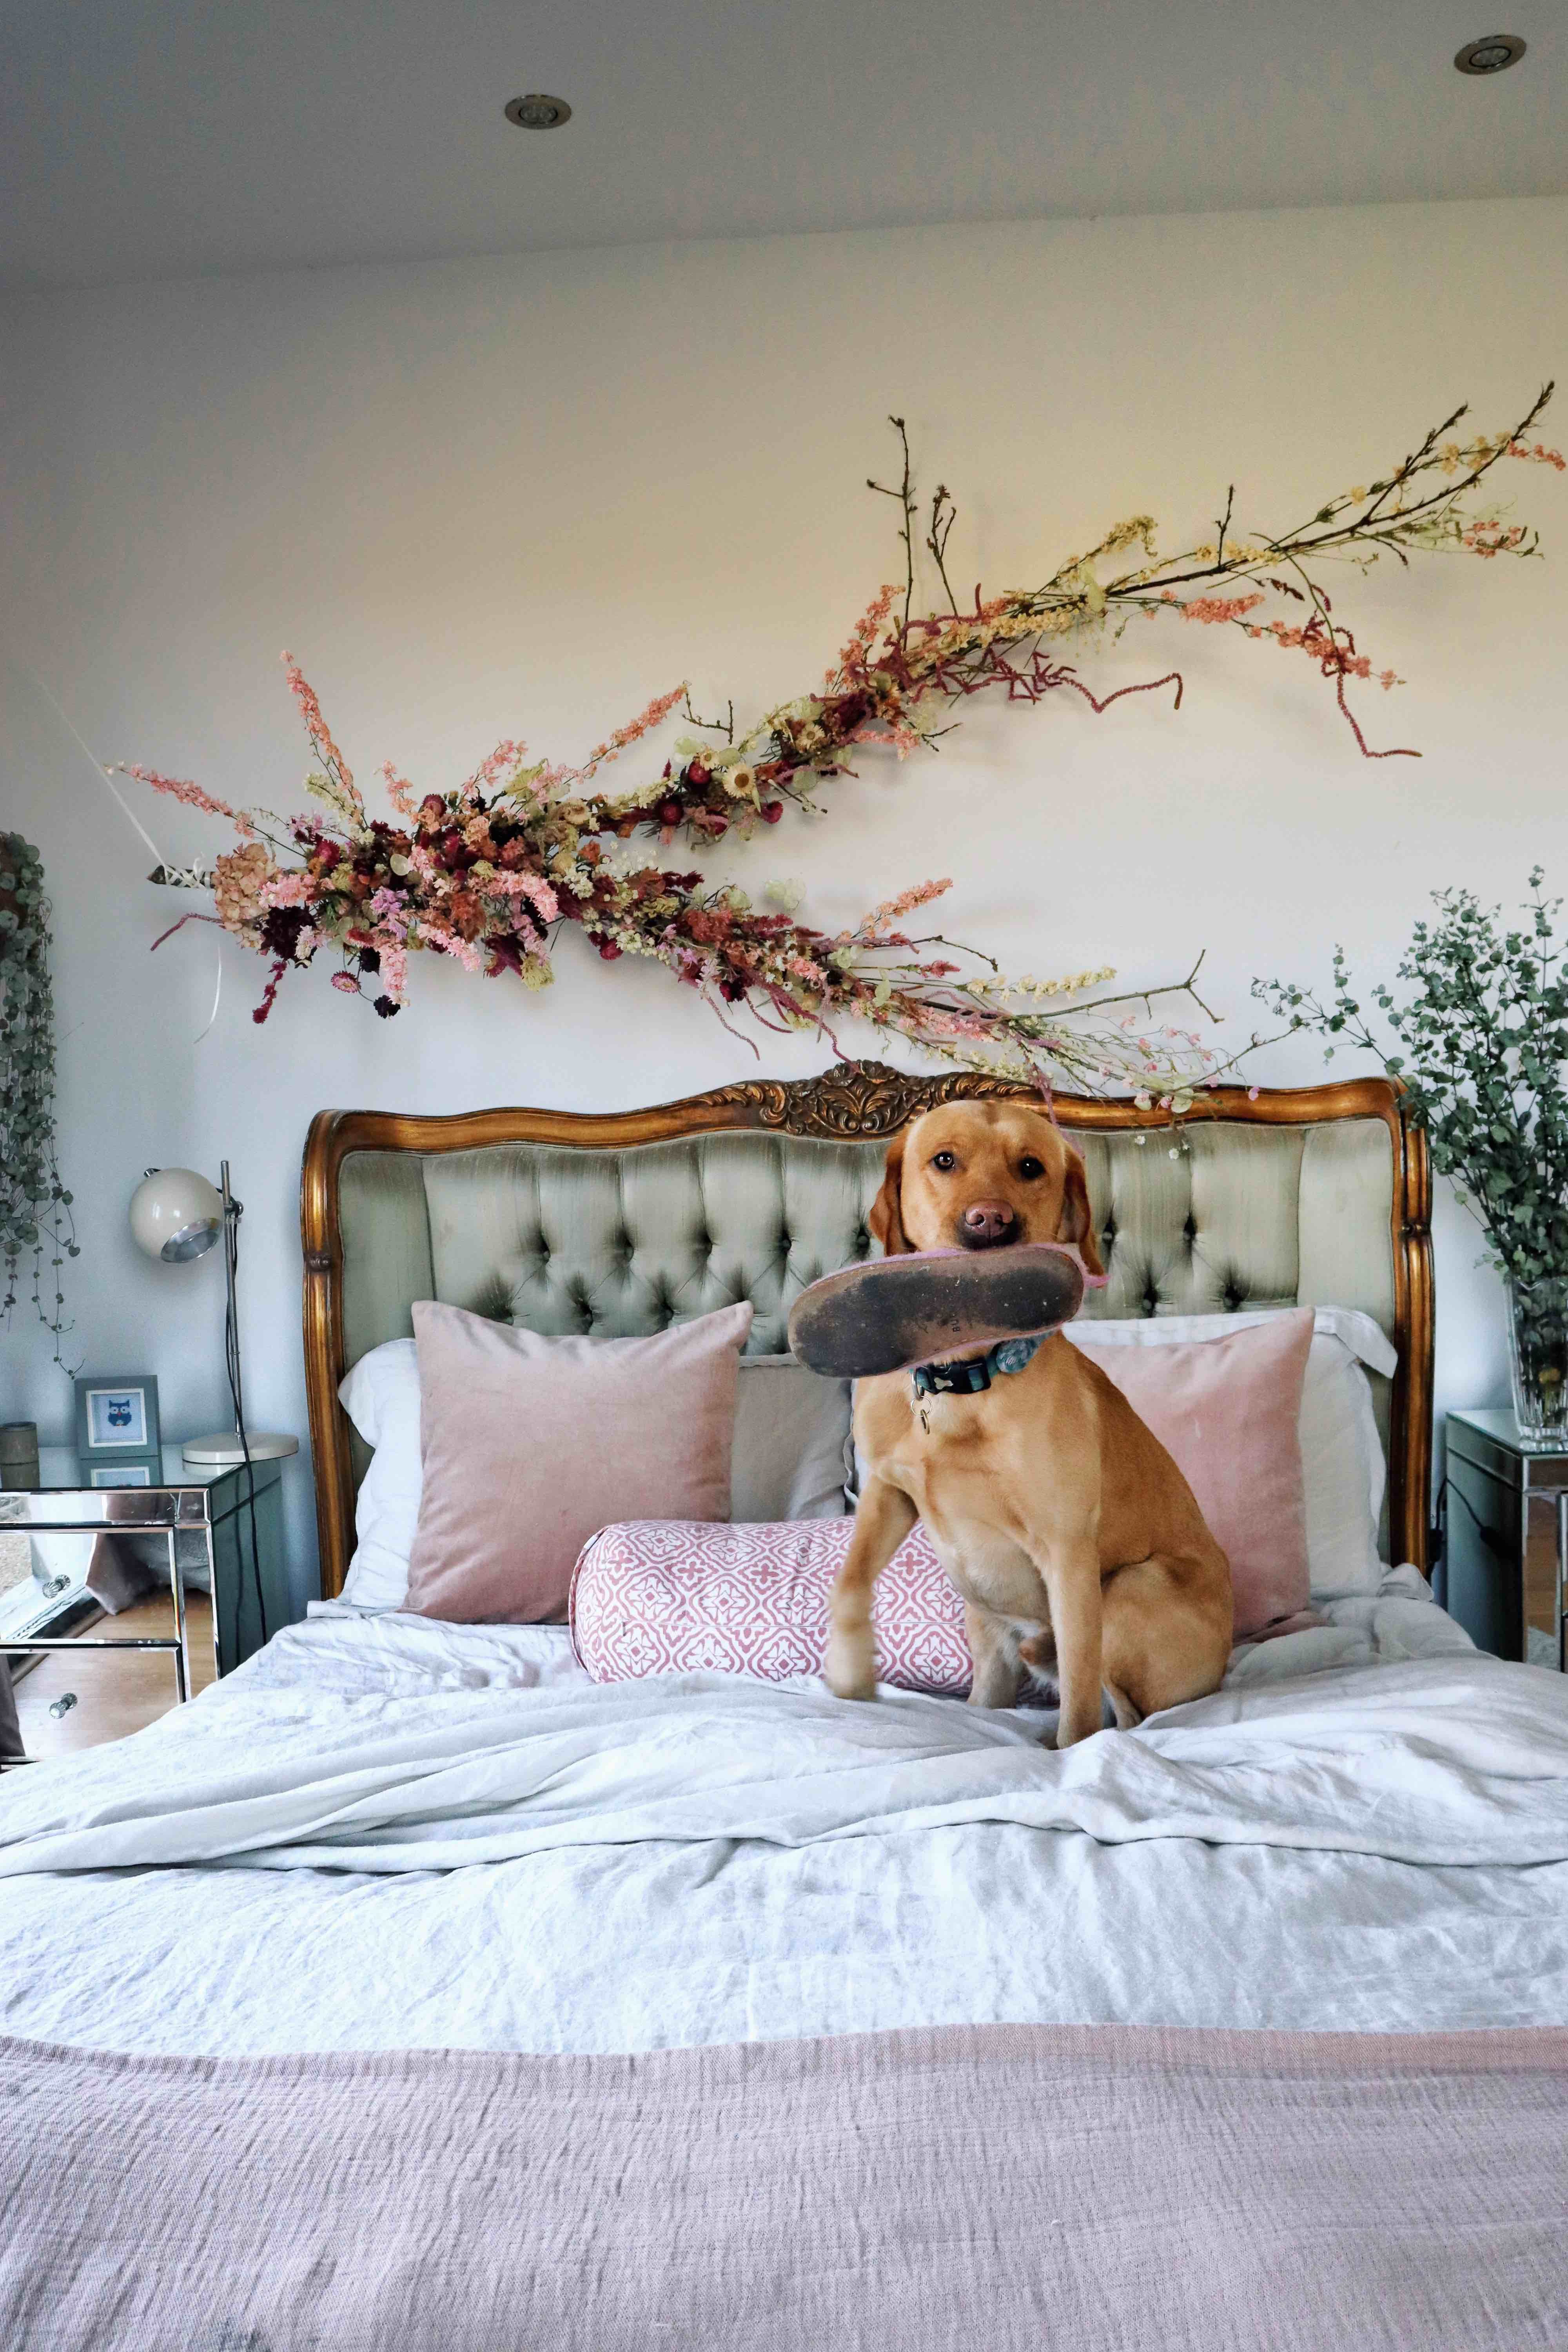
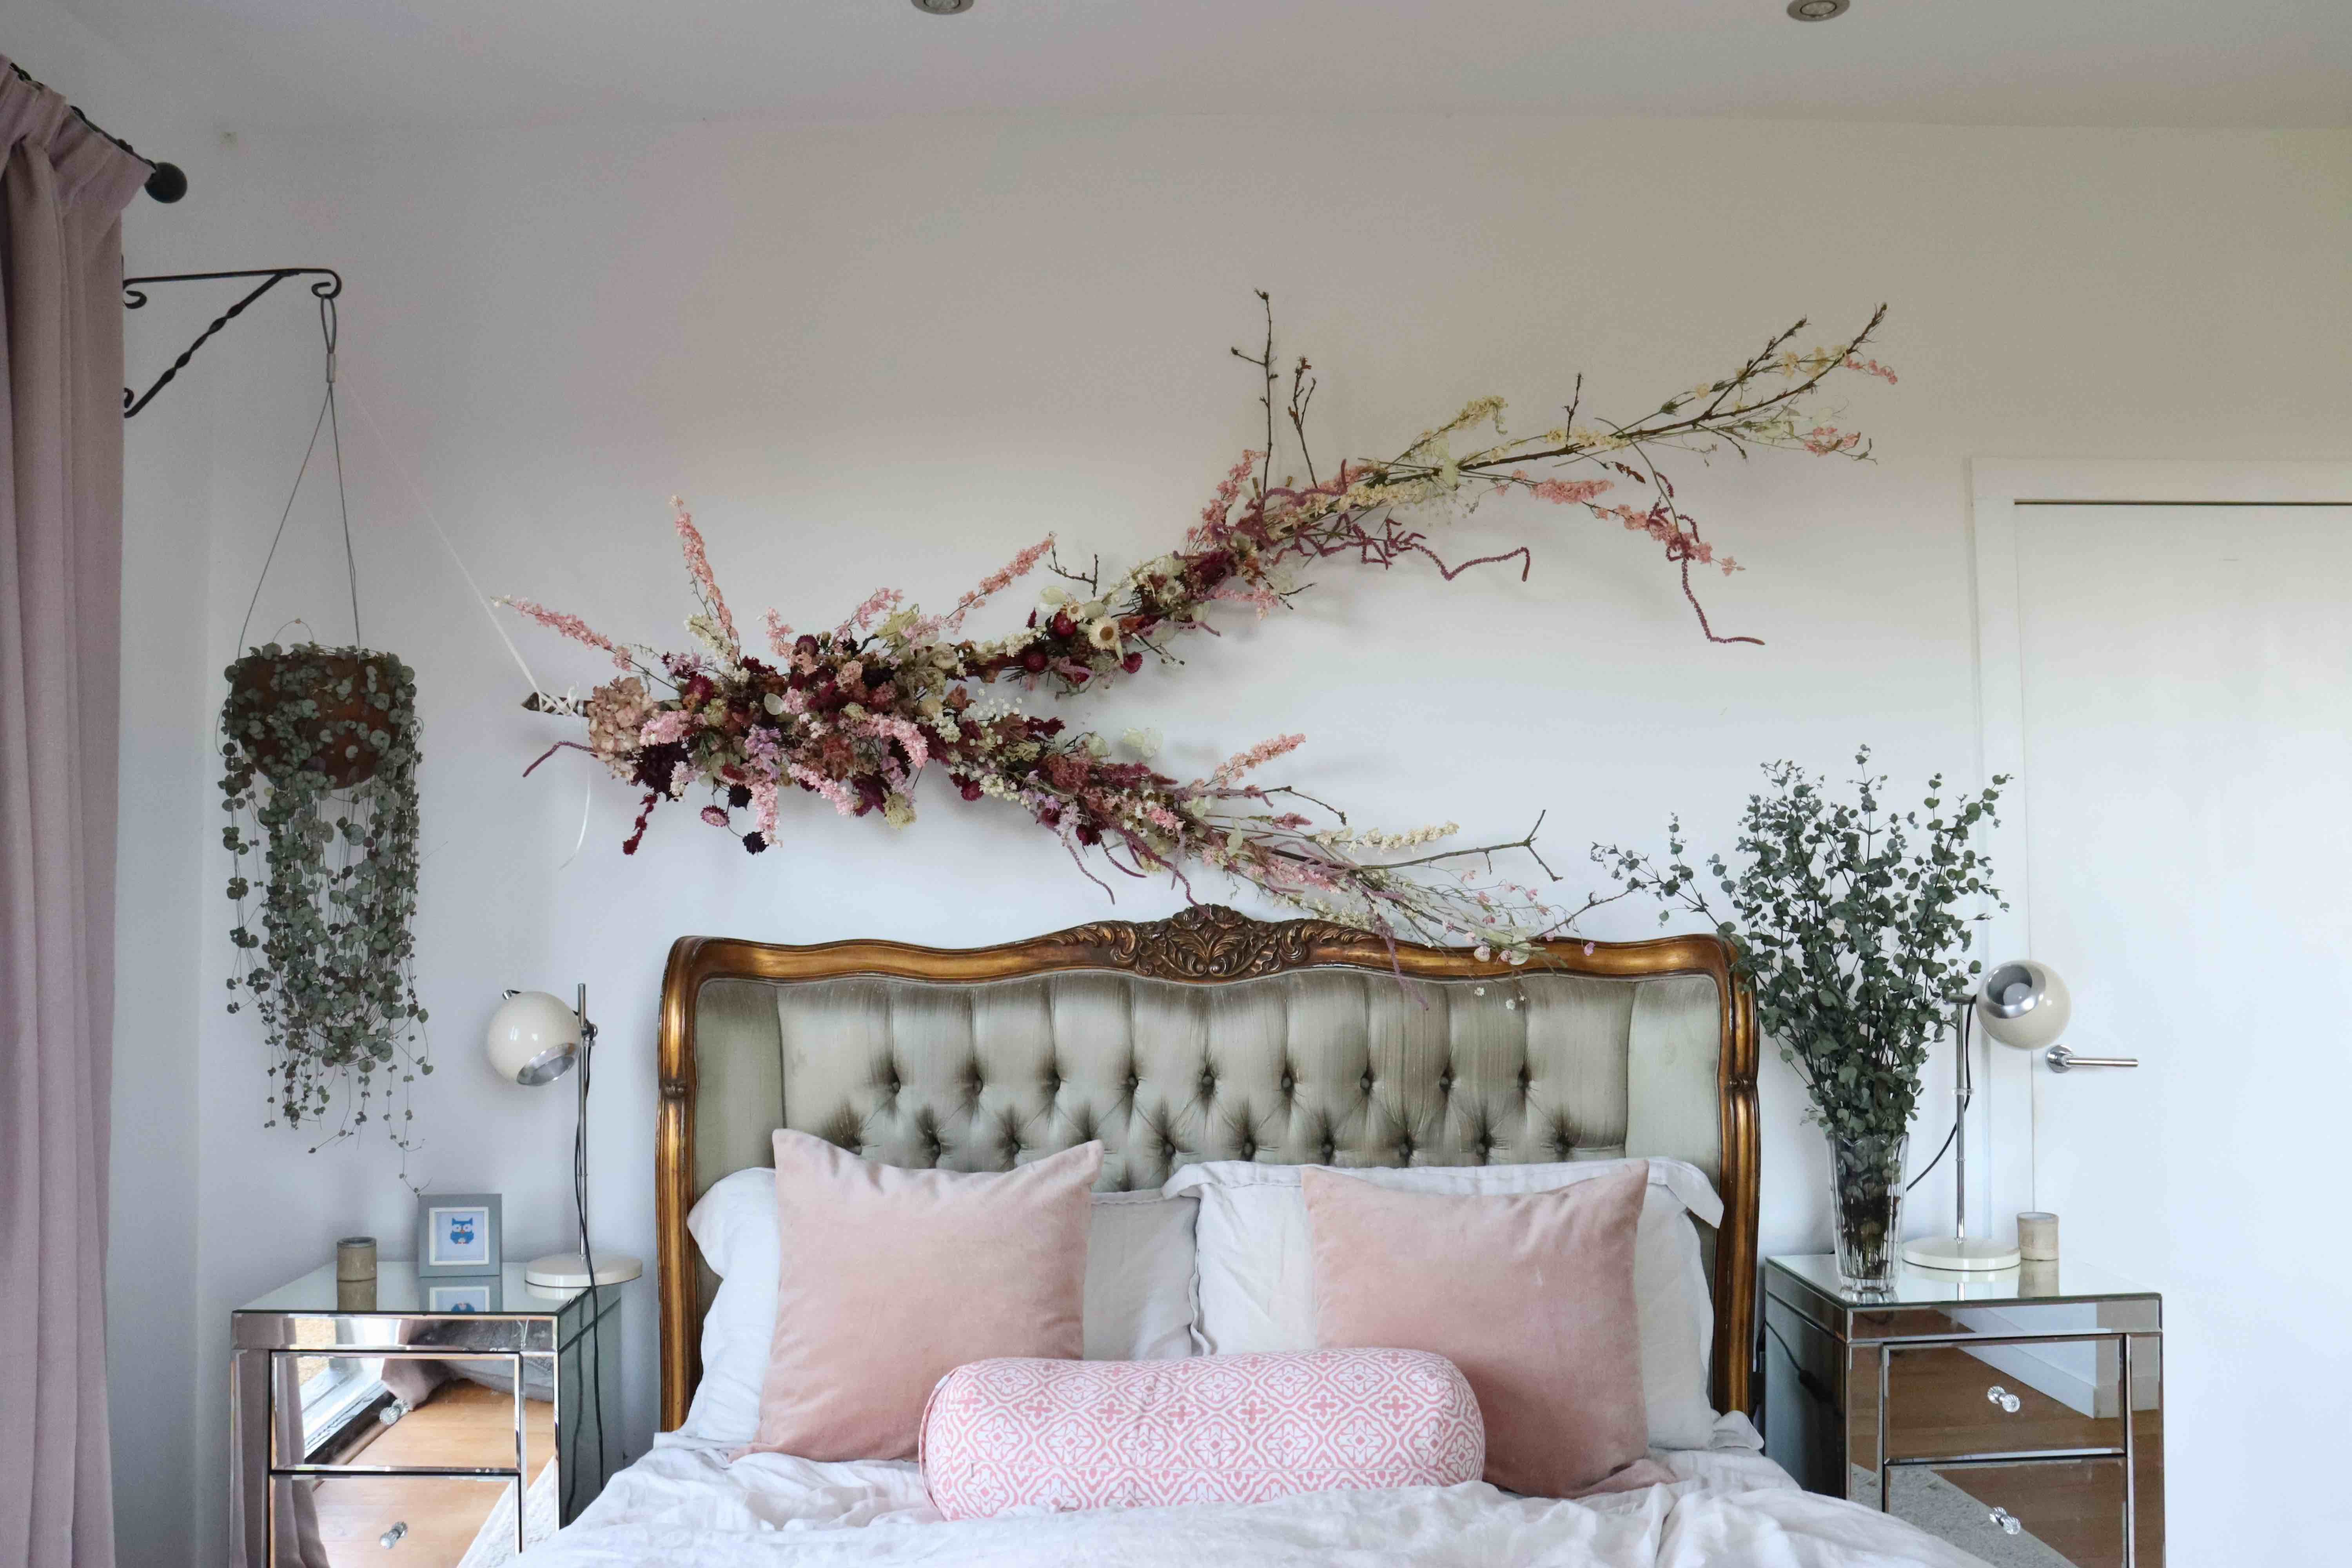
The space above our bed has been calling for something a little more exciting than the photograph we placed there temporarily 10 years ago. I had been wanting to make a large scale installation in our bedroom for a while, but wasn’t sure what my husbands reaction to be. I sensed there might be some resistance. I initially planned on using a much smaller branch, creating something small and tasteful. Then much to my surprise Martin said “go bigger”. No further encouragement needed!
I sourced the branch from one of our oak trees outside our home. Luckily for us, not so lucky for the oak tree, a lorry driver had snapped off one of its branches. I loved all the wiggle and movement in it, so brought it inside to dry off a bit. I also trimmed off all the extra twigs and branches I didn’t need. You will want to make sure your branch is quite dry before bringing into the house, as you don’t want it to mark the walls and you want to make sure it is strong enough to support any creation you design around it.
Once a sufficient amount of drying time passed I got started. I hung the branch in position over my bed. I secured the larger end to the plant hanger by the side of my bed, and used the nail in the wall over our bed to support the middle. If inspected closely I am sure my husband would have a heart attack, but it hasn’t fallen on us yet!
I wanted the installation to hint of cherry blossoms, so I knew it would be mostly pink. I also wanted the final piece to mimic the shape of the branch, thick and full at one end, wispy and thin at the other. I wanted it to look like what it is-a tree branch. To do this I wrapped plastic coated chicken wire around the thick end of the branch, to support lots of flowers, leaving the thinner end bare. Although I try to stay away from plastic as much as possible, I do allow myself this one luxury. Chicken wire coated in plastic is much easier on the hands and bends quite nicely. It also won’t scratch the walls and can be used over and over again.
I covered my bed with an old sheet for protection. Dried flowers are beautiful, but they are also incredibly messy. I started with my heavier flowers first. Dahlias in shades of pink, maroon and white were placed to cover most of the chicken wire at the heavy end. I then added some celosia, in darker shades of pink first, and then a lighter shade that would pop. I knew the celosia would provide some spiky interest, but also fill in any gaps the dahlias hadn’t covered.
Next was Larkspur. I had some beautiful light pink pieces I had dried as well as some white. These flowers would help outline the structure of the piece. They would extend lines and help create a wild and natural feel. Strawflowers and statice filled in any holes, adding pops of colour where needed. I used mostly antique white strawflowers, but I also had some lovely dark maroon ones that added some shade. For the statice I had the perfect shades of pink and apricot, but I used this sparingly. Although wonderful in keeping its colour, statice can be very delicate and will be the first to drop its petals.
The mechanics of attaching the flowers to the chicken wire is rather straight forward. Just stick them in! Initially the flowers will move around as you slowly build up materials. As you add the flowers, they will begin to stay where you want them.
Honesty, ammi and pink pokers were the final touches. They helped add lightness to the thinner end of the branch and wispy fun to the thicker end. They also added different shades of pink and maroon where it was needed. I attached these to the thinner end of the branch by wrapping some silver bouillon wire around the branch and very carefully weaving the flowers through it. The wire is thin enough that it is not very noticeable, therefore negating any need to fully disguise it.
The devil lies in the details for a piece like this. It is extremely important to walk away from your work and when you come back fix the things you see have gone wrong. The first thing I noticed after taking a break were all the stems I could see peeping below and behind the installation. They needed to be trimmed back, becoming almost invisible. I also made sure all of the plastic coated chicken wire was covered. Part of the fun of a piece like this is making people wonder how the hell did you do that?
As I mentioned before, we have had no issue of dried flower bits falling on us. I will say, they do smell a little bit. This doesn’t bother me and it is easily disguised by a nice smelling candle. In an open space the scent is not an issue, however if you are planning to create something next to a place you spend a lot of time, like your bed, it is worth putting a bunch of dried flowers there for a week to make sure their scent does not bother you.
This space is not particularly sunny, so I expect this installation to last for at least 18 months, but in actual fact it may be much longer. The colours may dull a little but as they are not in direct sunlight, I expect the colour to hold for a long time.
The great thing about thinking about this project in January is you can now make a list of flowers to grow, and dry, to make your own beautiful installation later in the year. As a recap the flowers I used were…
Dahlias
Celosia
Statice
Strawflowers
Larkspur
Honesty
Pink Pokers
Ammi
Any questions please pop them in the comments! My next post will be all about getting your sweet peas started and my 100% germination trick I use every year.
As a little side, this post is free but starting 1st of March I plan to start my paid subscription. When you sign up all of my grow and arrange content will be included, as well as my free posts of life on the farm. I will also have nailed taking landscape photos and videos by then!